Running the Analysis Platform from Sources
This is a quick start guide to get the SCAVA platform running from source with Eclipse.
Prerequisite
Install MongoDB
You can download MongoDB from the MongoDB website.
Install EclipseIDE
Although these instructions may apply to other versions of Eclipse IDE, they were tested under Eclipse 2019-06 (4.12.0) with plug-in development support (Eclipse IDE for RCP Developers package).
Get the Code
Get the latest version of the code, and checkout the dev branch. Please don't commit to the master branch: see the Development Guidelines:
If you are using Linux / OS X:
git clone https://github.com/eclipse-researchlabs/scava.git scava
cd scava
git checkout dev
If you are using Windows you need to do things differently due to Windows' long file name limit. In the Git shell:
mkdir scava
cd scava
git init
git config core.longpaths true
git remote add origin https://github.com/eclipse-researchlabs/scava.git
git fetch
git checkout dev
Configuration
Configure The Eclipse IDE
Setup the Target Platform Definition
We first need to setup the target platform definition of Scava. In Eclipse, import (File -> Import -> Existing projects into workspace) the project metric-platform/releng/org.eclipse.scava.target. Then, go to Window -> Preferences -> Plug-in Development -> Target Platform and check the scava target definition in the list. Confirm your selection and wait for the target platform to be resolved by Eclipse; this may take a while.

Figure-01: Setup the Eclipse Target Platform.
Import Projects into Eclipse Workspace
Import all projects from the top level directory of the Scava code (File -> Import -> Maven -> Existing Maven Projects), and wait for all the projects to compile without errors.
In the case that the Eclipse IDE may trigger errors related to "Plugin execution not covered by lifecycle configuration: org.eclipse.tycho:tycho-compiler-plugin:1.1.0:compile". Right-click on one of them, select Quick Fix, let Eclipse install the appropriate M2E connectors and restart:
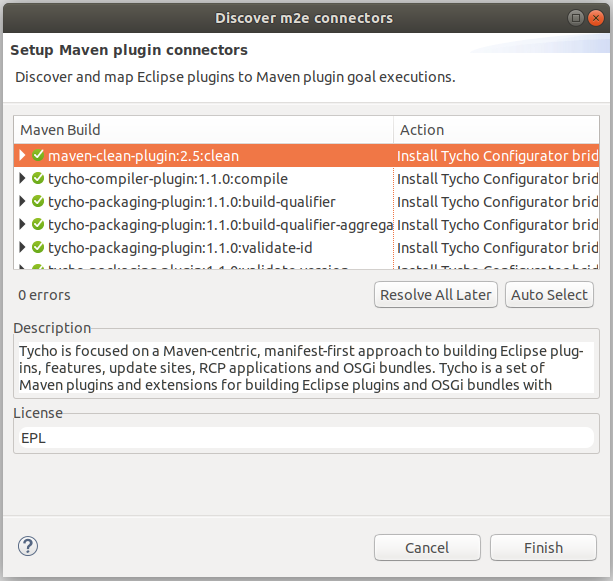
Figure-02: Install m2e-connectors plugins.
Configure the Analysis Platform
identifier=<your name>
The identifier of the node. If not specified, the platform will attempt to use the node's hostname, and if it cannot resolve the hostname, it will generated a random UUID.
If you plan to multiple instances of the platform on the same machine, you should definitely specify different node identifiers.
log.type=console|file|rolling
You can specify whether to log output to the console (Log4J's ConsoleAppender), to a particular file without a size limit (Log4J's FileAppender), or to a different file per day (Log4J's DailyRollingFileAppender). If you specify file or rolling, you must complete the log.file.path or log.rolling.path property as well.
If the property is not specified, it will default to the console logger.
log.file.path=<path>
The path to the file to store the log. E.g. log.file.path=/tmp/lovelylog.log
log.rolling.path=<path>
The path to the file to store the log. This is a Log4J DailyRollingFileAppender that will create separate logs for each 12 hours of the day. The date stamp will be appended to the path provided. E.g.: if you specify log.rolling.path=/tmp/mylovelylog.log, it will store files like so: /tmp/mylovelylog.log.2014-12-17-00 and /tmp/mylovelylog.log.2014-12-17-12.
maven_executable=<path>
The path to where Maven is installed. E.g. maven_executable=/usr/bin/mvn
storage_path=<path>
The path to where files should be stored. E.g. storage_path=/mnt/ossmeter/
mongo_hosts
A comma-separated list of the hosts and ports in a replica set. E.g. ua002:27017,ua009:27017,ua019:27017,ua020:27017
Run the Analysis Platform
Start MongoDB
Instructions for starting mongo can be found in the MongoDB manual. For example:
sudo systemctl start mongod
or
sudo service mongod start
Validate and Run the Platform
- Open
releng/org.eclipse.scava.product/scava.product. - Click the
Validate...icon in the top right of the product configuration editor (the icon is a piece of paper with a tick). - If things do not validate, there's something wrong -- get in touch :) Problems related to
org.eclipse.e4.core.diaren't critical. - Then, click the
Export an Eclipse producton the left of theValidate...button. Uncheck theGenerate p2 repositorycheckbox, select a destination directory and validate. After a while, the SCAVA platform will be generated in the selected directory. - The platform can then be run using the generated
eclipsebinary; it accepts the following arguments:-apiServer: Starts up the client API on localhost:8182.-worker ${id-worker}: Spawns a thread that analyses registered projects.
- To get a full platform running, first launch a worker thread, then the API server.
When starting the platform, you can pass a configuration file to control the behaviour of the platform:
./eclipse -worker ${id-worker} -config myconfiguration.properties
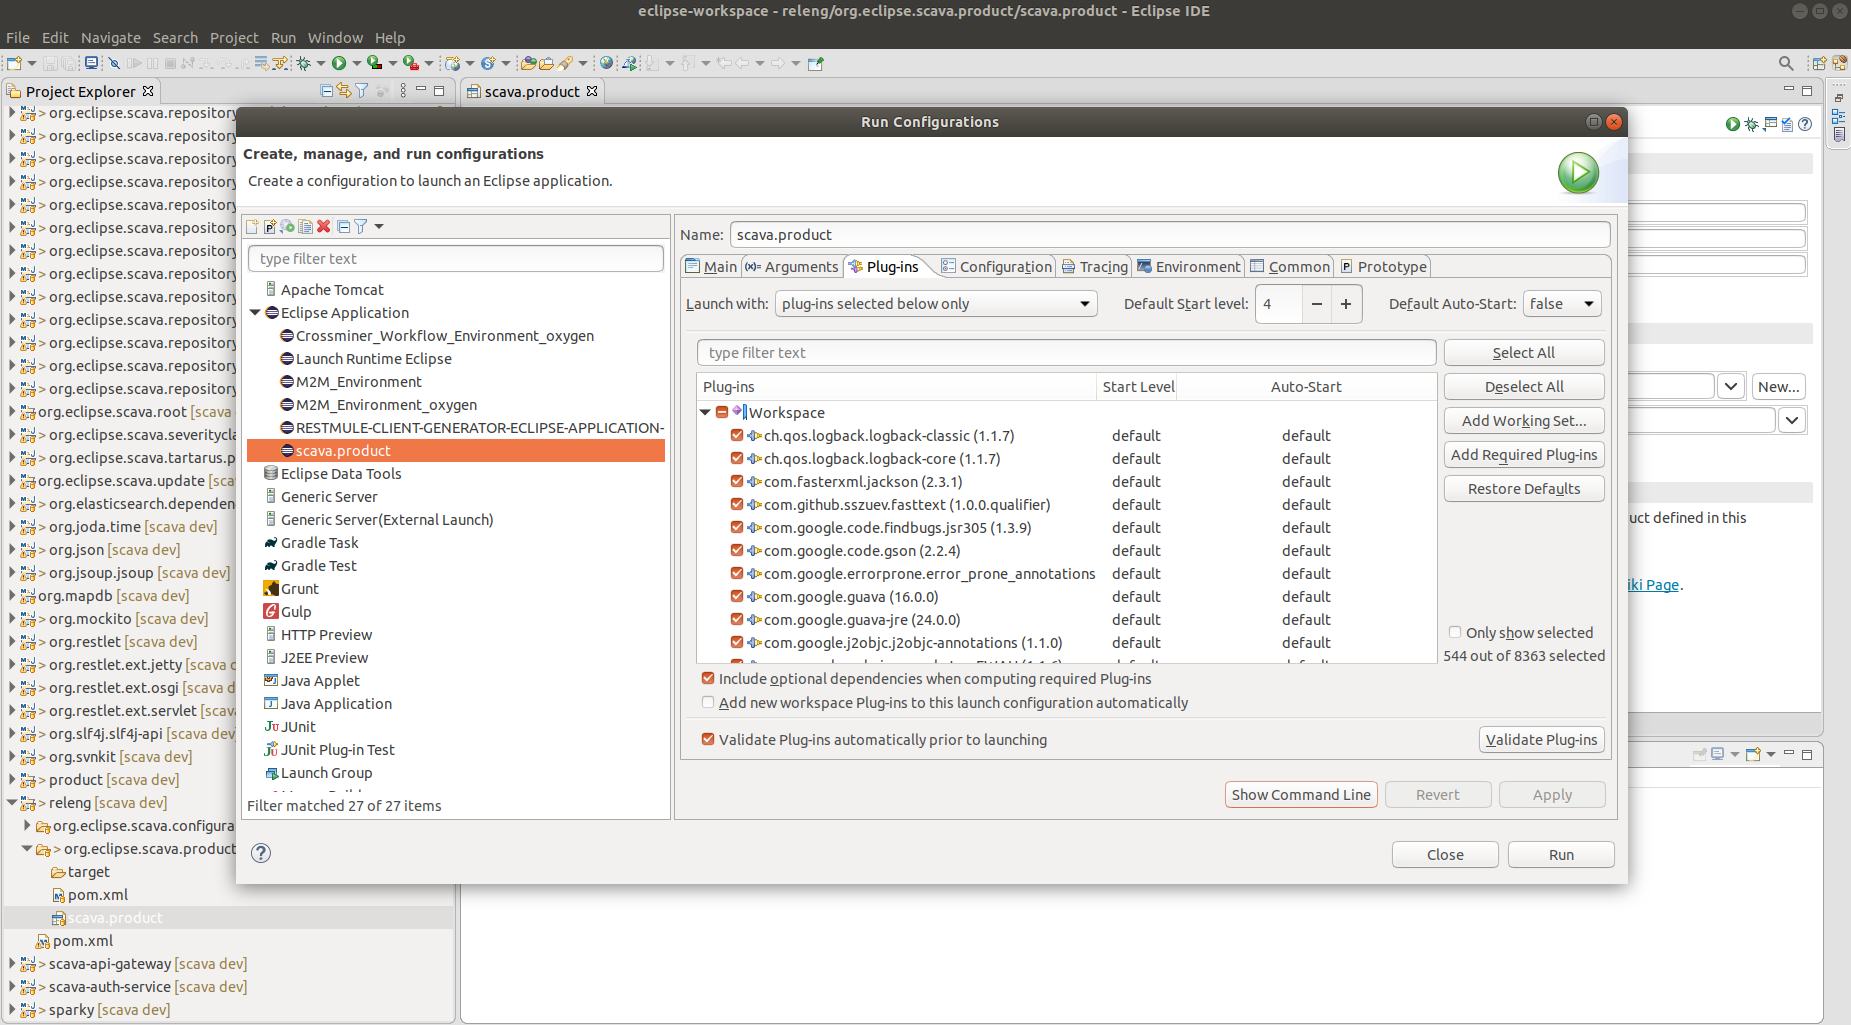
Manage the runtime missing dependencies
In case that the previous steps doesn't launch your RCP application (mainly due to a runtime missing dependencies), the "Add Required Plug-ins" option allows you to validate (i.e. select only the right amount of plugins you actually need) your runtime configuration.
To do so, go to Run menu and select Run Configurations....
From the list of the left hand side, select the run configuration for your Eclipse application, then choose Plug-ins tab at the right dialog box. To resolve the runtime dependencies effectively required to run the RCP application, click on Add Required Plug-ins button the Apply to save the changes and re-run your configuration.